Great outdoor portraits in 6 easy steps
I am thrilled to have my friend and great portrait photographer Nayeem Reza chime in today and share his favorite quick tips on taking beautiful outdoor portraits:
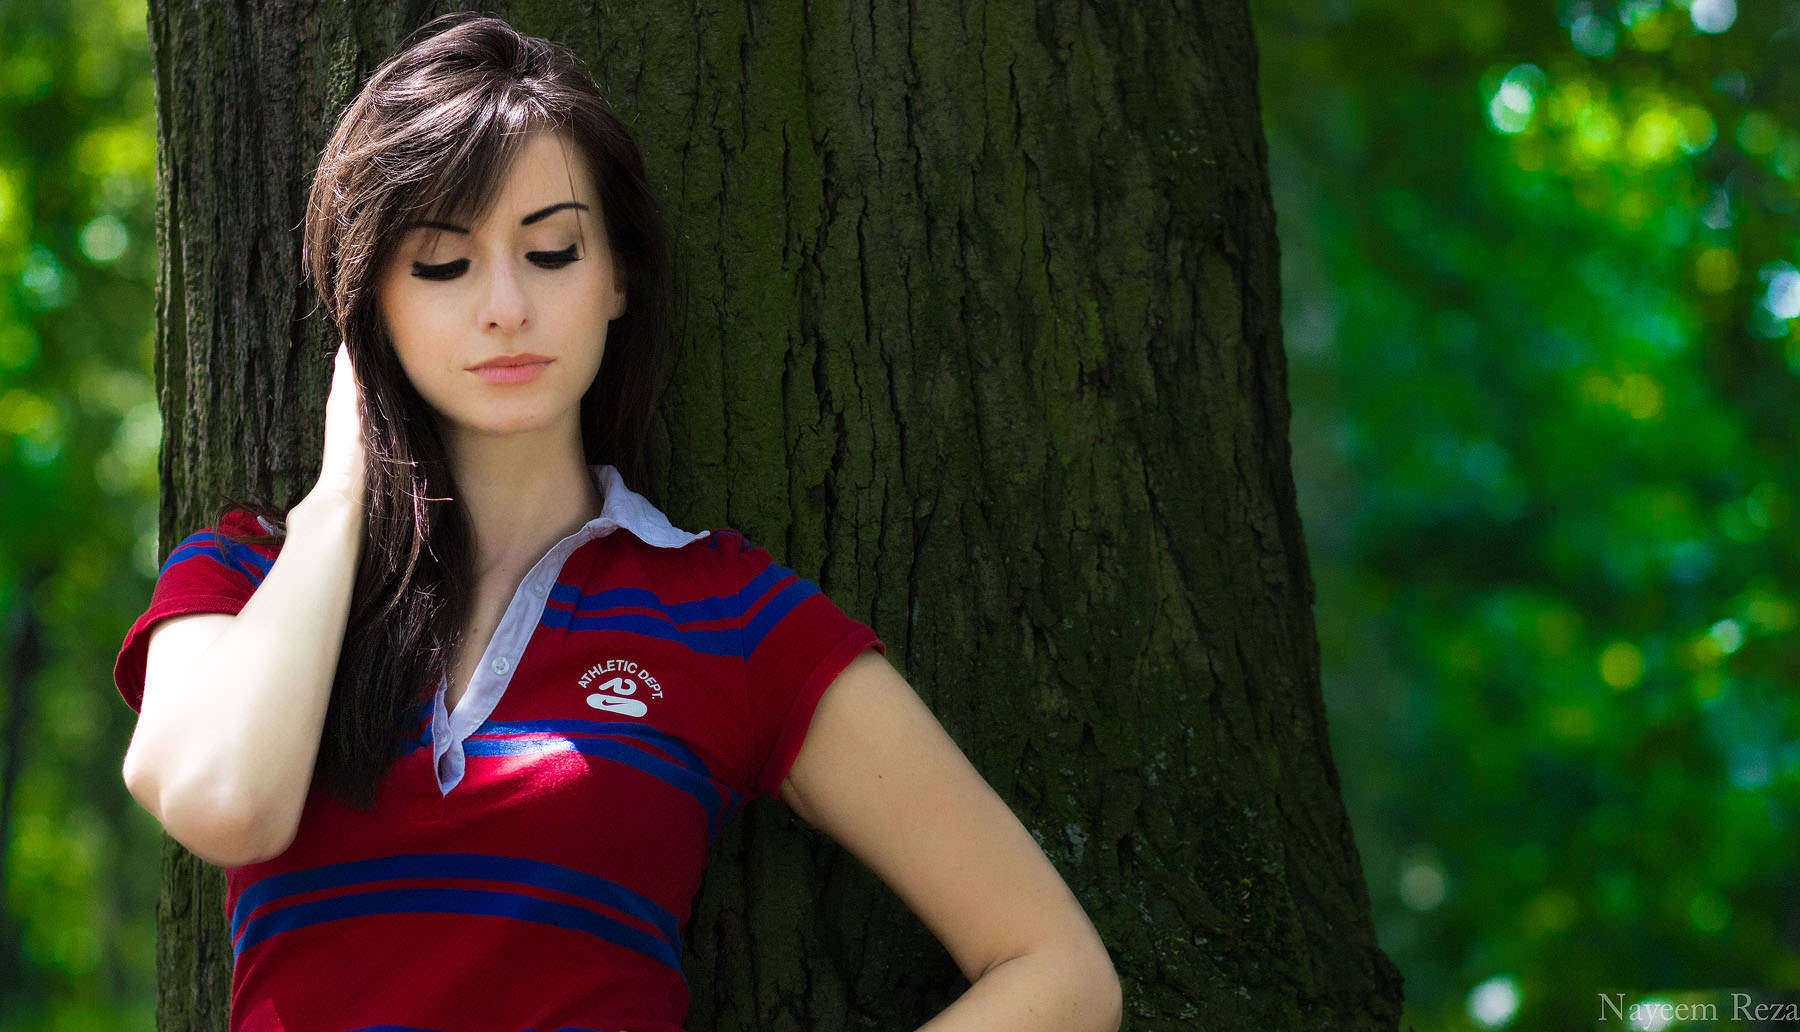
- Let the sun rays fall on your subject's face. If you have a reflector, you could do that manually
- Set your ISO settings to 100
- I personally like a blurred background for portraits, I would go for aperture f/2.8. It will separate your subject from the background and will create a good depth of field.
- If you are a Canon crop sensor user, the Canon EF 85mm/1.8 lens is excellent for portrait photography in terms of its sharpness, wide aperture and cheaper price.
- Depending on the light, I would change the shutter speed. For the above picture I used 1/500.
- Focus on your subject's eyes, and click!
Congratulations! you have just taken an awesome photo!
You can check out more of Reza's work and follow him at Belissimo Photography!

Wait! That's still not what I wanted!
Don't worry, Help is at hand!
If Reza's tips did not do the trick yet, check out our usual troubleshooting guide.
Try the first step and if needed add the next one
- Make sure that the background is 10m or more behind the subject. In above example, the tree right behind the subject is not very blurry, but the bushes further back are.
- Use the lowest aperture your lens can afford. But check that your subject is still completely in focus.
- Use a zoom lens, go further back and zoom in all the way.
-
Check that your shutter speed is not slower than 1/125 sec. If it is, and you are already at the lowest aperture number, increase the ISO to 200, then 400 if necessary.
- Make sure to put the focus spot on the eyes of your subject.
Increase your aperture number to the next possible one, keep the focus on the eye. More of the face will get in focus if you increase the aperture number more.
- Tell your subject to close her eyes until you are all set to take the shot. On your signal she can open the eyes and you take the shot in that instance.
- Another option is to place the subject with the light behind her, but with the sun not directly in the photo. Like this you get a nice glow on the hair and the face is still bright enough.
- Dial your exposure compensation to +1, +2 if necessary. This will result in longer shutter speeds, so make sure to check the sharpness on the LCD.
- Have your highlight warning switched on to see any overexposed areas quickly! If you see anything blinking, dial the exposure compensation down a bit again. If the photo is still too dark then, use post processing software to pull up the shadows slider slightly.
- Do not shoot at midday when the sun is high. You get the nicest portrait light around Golden Hour. Use Golden Hour Calculator for the best times at your location.
- Find the exposure compensation button and set it to -1, then -2.
You also get really good results if you use a zoom lens and zoom in all the way, ideally to 85mm or more (on a crop sensor).
A very typical portrait focal length is also 50mm (on a crop sensor).
The camera brand does not change this, simply choose a lens with a focal length of 50mm or more. Your kit lens likely will do well.
Leave a Reply